
I do the bulk of my grocery shopping at Costco and Trader Joe's. I try to buy organic when I can on the things that matter most like fruits, vegetables (see the dirty dozen list) meat, and eggs. I haven't made the switch to milk yet. I also use Azure Standard for things like bulk grains, raw honey, coconut oil, coconut milk, etc.
It has been so nice to find a good supply of organic items at Costco. One of the regular things I buy there is the two-pack of organic whole chickens.
Eating well isn't cheap. It's about $20ish for 2 whole chickens. With that in mind...I don't want to waste a thing so this is what I do to make the most of it...

The next day, I use my Nesco 18 quart oven roaster to cook both chickens at the same time. I remove all the innards, wash the birds and place them on the roasting rack. I only season with salt and pepper so that I have versatility later. I add about 2 cups of water, put the lid on and come back in about an hour.
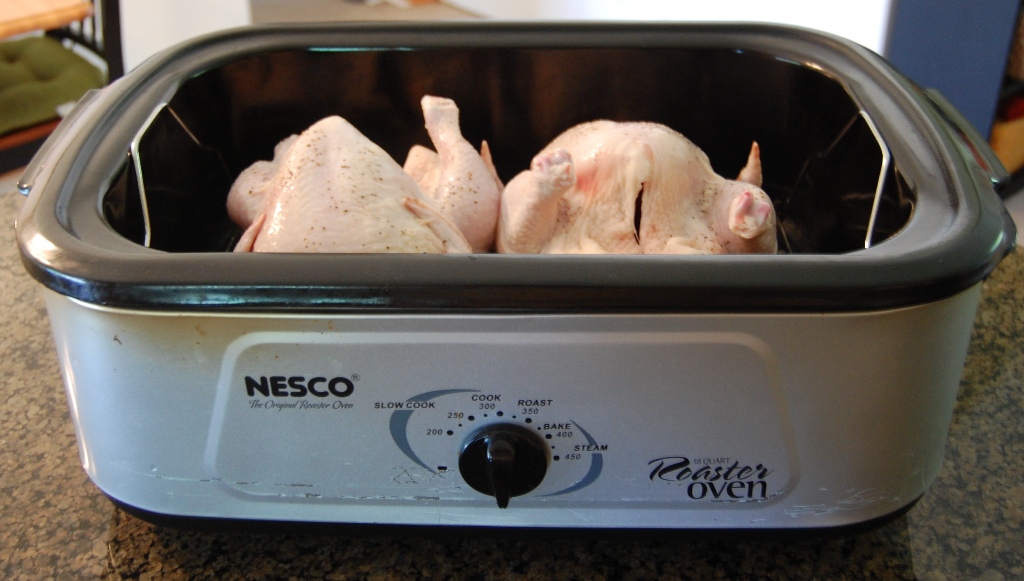
{Side note...I love this roaster because it fits as many as 3 chickens or a turkey! It's a great way to cook your Thanksgiving turkey freeing up your oven for all your side dishes...about $65 if your shop around.}
I let them cool a bit so I can handle them. I take the meat off the bones and put it into Ziploc bags labeled COOKED CHICKEN with the date, then I put it in the freezer. Now I have cooked boneless, skinless chicken ready for the future. I divide the meat up so as to go along with my menu plans. Having boneless, cooked chicken ready is so great.
I put all the bones from both chickens in a Ziploc bag labeled BONES with the date and put it in the freezer. At a time that is convenient, I pour the bones into my large soup pot (sometimes I have as many as 3 bags full!) and cover with water. Bring it to a boil and then simmer for a couple of hours. Let that cool.


I then use my large collander and my big Tupperware Thatsa Bowl. I place the collander into the bowl and pour the broth into it. The collander catches all the bones while letting the broth through to the bowl. Depending on how much liquid you have, this might take a time or two to do.

Once I have the broth in the bowl, I use my canning funnel and a large (1/2 gallon) size canning jar. Pour the broth into the jar and cover with a Ball plastic cap. I usually end up with several jars, depending on how many bags of bones I had. I label the jars with the date, using a Sharpie marker. The Sharpie will wash off with the scrubbie side of a sponge. (If it doesn't want to come off easily - then use a little rubbing alcohol..it'll come right off.)
Homemade broth is THE BEST!! It makes all the difference in your recipes and is so incredibly nutritious. Homemade broth is rich in calcium, magnesium, phosphorus and other trace minerals. The minerals in broth are easily absorbed by the body.

After cooling, there will be a layer of fat on the top, just scoop it out and discard that before your use your gelantinous broth.
This is perishable so be sure to have a plan to use it up within about 10 days...or you could freeze it!
Sure, it's a bit of work, but I have to say the biggest reward is when my husband or children say, "WOW, it smells amazing in here, Mom, what's for dinner?"
And the flavor is superb!
No comments:
Post a Comment
I always look forward to reading your comments. Thank you for taking the time to leave one. :-)